|
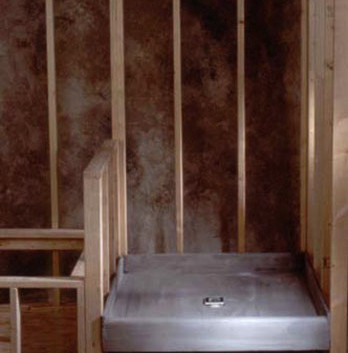
The Fin Pan PreFormed Shower Pan is a ready to Tile waterproof shower pan that can be installed in minutes, which reduces the time and labor involved with the old mud bed methods.
Pans are made from high-density expanded polystyrene, concrete backer board, fiberglass mesh and a liquid waterproof membrane finish. Drain assembly is cemented into base. Pans are 100% waterproof and ready-to-tile
With our shower pan you can use any thin-set setting material while other require to only use an epoxy setting material.
Our shower pan are comprised of a high compressive strength polystyrene base and curb with our 1/2" ProTEC Concrete Backer Board sidewalls
You will never go back to your old ways, once you install a PreFormed Ready to Tile Shower Pan.
It weighs a third less than comparable fiberglass or plastic showers.
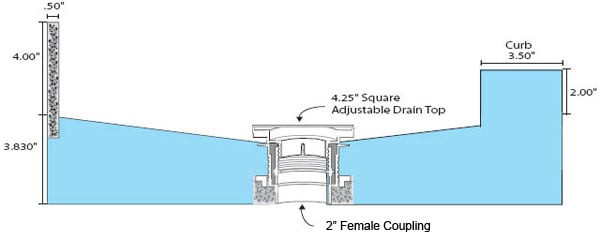
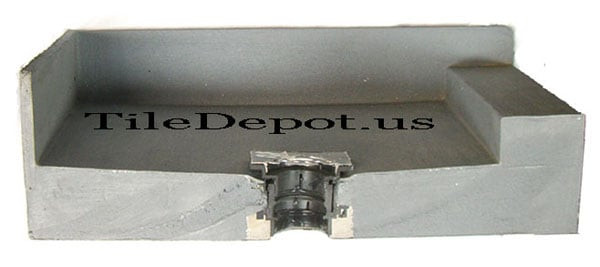
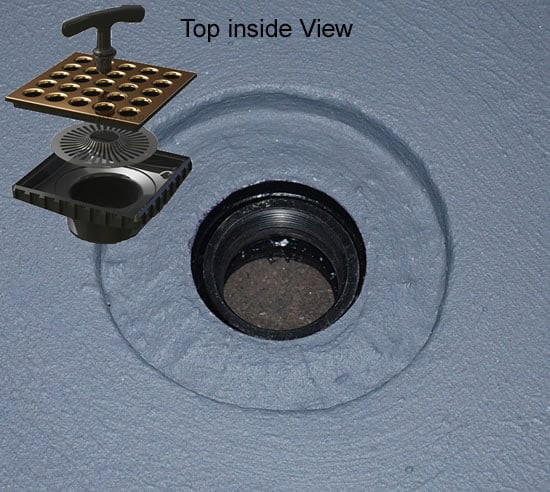
The drain is built-in and adjustable for your chosen tile thickness.
It is easy to handle and install.
PreFormed Shower Pans are sturdy and waterproof, made of high-density polystyrene, fiberglass mesh, and a latex polymer liquid waterproof coating.
These seats install in fraction of the time required for traditional methods
Most importantly, the pans come 100% waterproof and will never rot or degrade.
Shower pans come with a standard 6” integrated side splash and curb so you don’t need special framing or waterproofing.
Every pan is sloped to ¼” per foot and no mud float is needed.
Time saving… Waterproof… Worry Free. The difference is CLEAR.
Note: It is the user’s responsibility to ensure waterproofness prior to tiling.
INSTALLATION
1. Sub floor under shower pan must be clean and level. Cut PVC or ABS drainpipe off flush with the subfloor.
2. Cut PVC or ABS drainpipe 5/8” above the sub floor.
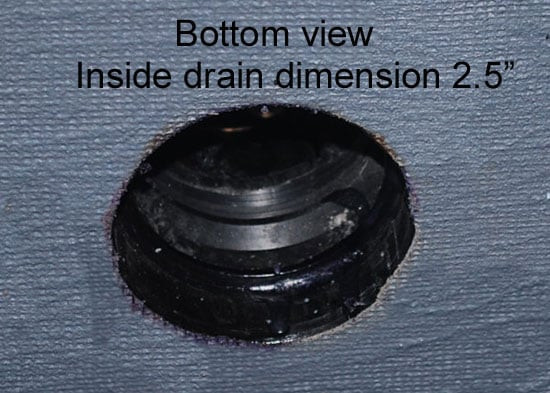
3. Remove square top strainer from the drain, allowing access to line up the drainpipe from the top.
4. TEST FIT** shower pan to be sure it fits over the drainpipe properly and sits flush and level with the floor.
5. Remove the shower pan.
6. Apply a Polymer Modified Portland Cement Medium Bed thinset using a ½” x ½” square notch or 19/32” half moon trowel, completely covering the area beneath the pan.
7. Apply liberal coating of PVC* or ABS* solvent cement to the drainpipe and inside the drain where the connection will be made. *Solvent choice based on drain type. Always follow solvent manufacturer’s instructions.
8. Set pan into the wet thinset and apply pressure to achieve complete coverage.
9. Plug the inside of the drain pipe and fill the shower pan with water for 24 hours.
10. Apply Util-A-Crete®, ProTEC™, or ProPanel™ backer board to the walls, coming flush with the top of the shower pan sides.
11. Seal the joint between the backer board and the shower pan using a Latex Polymer Liquid Waterproof Membrane and fiberglass reinforced mesh.
12. Install tile. :)
Shower Pan Sizes with center drain location (In Stock except where *noted):
| Style Number |
Size |
|
32” x 60” |
|
34” x 48” |
|
36” x 36” |
|
36” x 42” |
|
36” x 48” |
|
36” x 60” |
|
42” x 42” |
|
48” x 48” |
|
Any Size or Shape |
* Please allow 5 days lead time for these models
Custom sizes available upon request. An exact drawing with dimensions, drain location,
and curb location is needed.
|